I have used Shopify to sell over 100 different products, and I wrote this review to prospective Shopify users who want to know the pros and cons of using the Shopify e-commerce software in comparison to competitors such as WooCommerce, Magento, and a ton other e-commerce solutions. I’ve broken down the review into separate posts, so that you can easily go from section to section and see how Shopify compares to various other services, and also so that you can skip ahead to the sections you want to read instead of having one massive post about everything and anything.
Note: Most of the information presented below is offered with the assumption that you have already signed up for the free trial offered by Shopify so that you have access to the admin section of the store builder and can see for yourself how each part works. If you haven’t already signed up for Shopify, you can do so by clicking on the banner below for a free 14-day trial.
Section 1: Ease of Use and Learning Curve
Designing the Website
So what most people want to know right from the beginning of starting an online store is what they need to know in terms of building the actual website. Luckily with Shopify you don’t need to know a whole lot, but basic understanding of HTML and CSS might come in handy if you want to make specific changes to the theme that you purchase, but it is certainly not required. With that said, you will start your Shopify store by choosing a theme from the Shopify theme store. There are a variety of free themes available, and I have compiled the best free Shopify themes into this list here so you can read about the pros and cons of each one.
If you are looking to spend money on a theme, there are a lot of options available for you to choose from. Shopify is simple in that when you buy a theme, you can expect the your final store to look nearly identical if not exactly the same as the theme you purchased. There is a slight learning curve in order to understand how the theme design and customization works, but it’s not too bad, most of what you are customizing is the text, photographs, and location of different pieces of the site (also known as “modules” in other E-commerce builders). The hardest part of theme customization is sizing the pictures correctly, as most themes do not do this for you, you’ll have to use a photo editor to get the correct dimensions and play around with it a bit in order to get it looking just right.
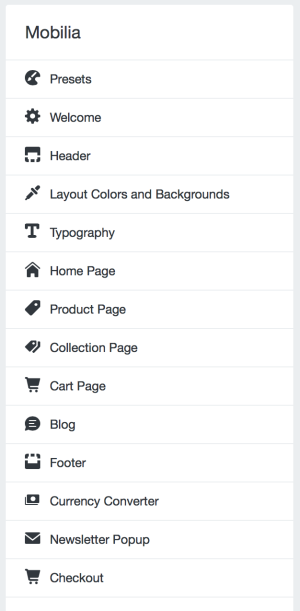
Below I have a screenshot of what the theme editor looks like for one of my themes that I use, you can see that each section based on the title makes sense in what it will change. If for some reason your theme settings are not as straightforward as mine, reach out to the theme developer and ask for a instruction document or style guide, they should have this readily available and will be happy to share and support you with any questions you might have.

As you can see, most of the options are pretty self explanatory – “Presets” stands for pre-made layouts from the theme creators, Layout Colors and Backgrounds is how you customize the text color, hover color, and background images (if any). Conveniently Shopify puts the live preview of the site itself to the right side of the customizations bar, so you can see exactly how your changes look before they go live to be seen by the customer.
The learning curve to changing the way your website looks is not hard using Shopify. You can adjust the way your website displays on many platforms as well, including mobile and tablet view. By default most Shopify themes from the themes store are responsive, meaning they will resize and act normal with a wide variety of devices.
If you want to make huge adjustments, massive flexibility and even have a custom Shopify theme built for you, you can hire a Shopify expert who can do all the work for you, as long as you have a clear objective in mind and are willing to part with some cash. (Most Shopify experts start at $500 per project for their services, which includes importing your pre-existing products, choosing a theme for you, setting up your domains, arranging the site structure, and offering basic training on how to add products and make changes in the future.) I would recommend hiring a Shopify expert only if you don’t have the time to learn how to do these actions yourself, or if you want your store to be up and operational as fast as possible because of a time constraint.
Adding Products
As with customizing the look and feel of the website, adding products is, for the most part, simple and straightforward. This video shows you in under five minutes how easy it is to add products. The video itself is about a year old and the layout might look slightly different from how you add a product today – but the concepts and order of the steps are exactly the same.
Hopefully what you got from that video is that everything is very straightforward. A few notes that I want to stress that the commentator doesn’t touch on too much is that setting an item on sale is done via the “Compare at Price” option. Setting the compare at price is not the price you are selling the item for, rather, it is the “full purchase price” before the discount or sale is offered, so customers can see how much they are actually saving. Leaving the “Compare at price” option unselected or empty will not cause the item to be on sale and it will appear normally.
Alright, so by now you should see how easy it is to perform certain actions and get used to using the different tools that Shopify offers, but how does the pricing of Shopify compare to the costs of other E-Commerce platforms, and what am I really getting for my money? Read the next article to find out! (Coming soon, I need more coffee first).


